Securing SSH Access on a Public Linux VPS: Disabling Passwords Safely
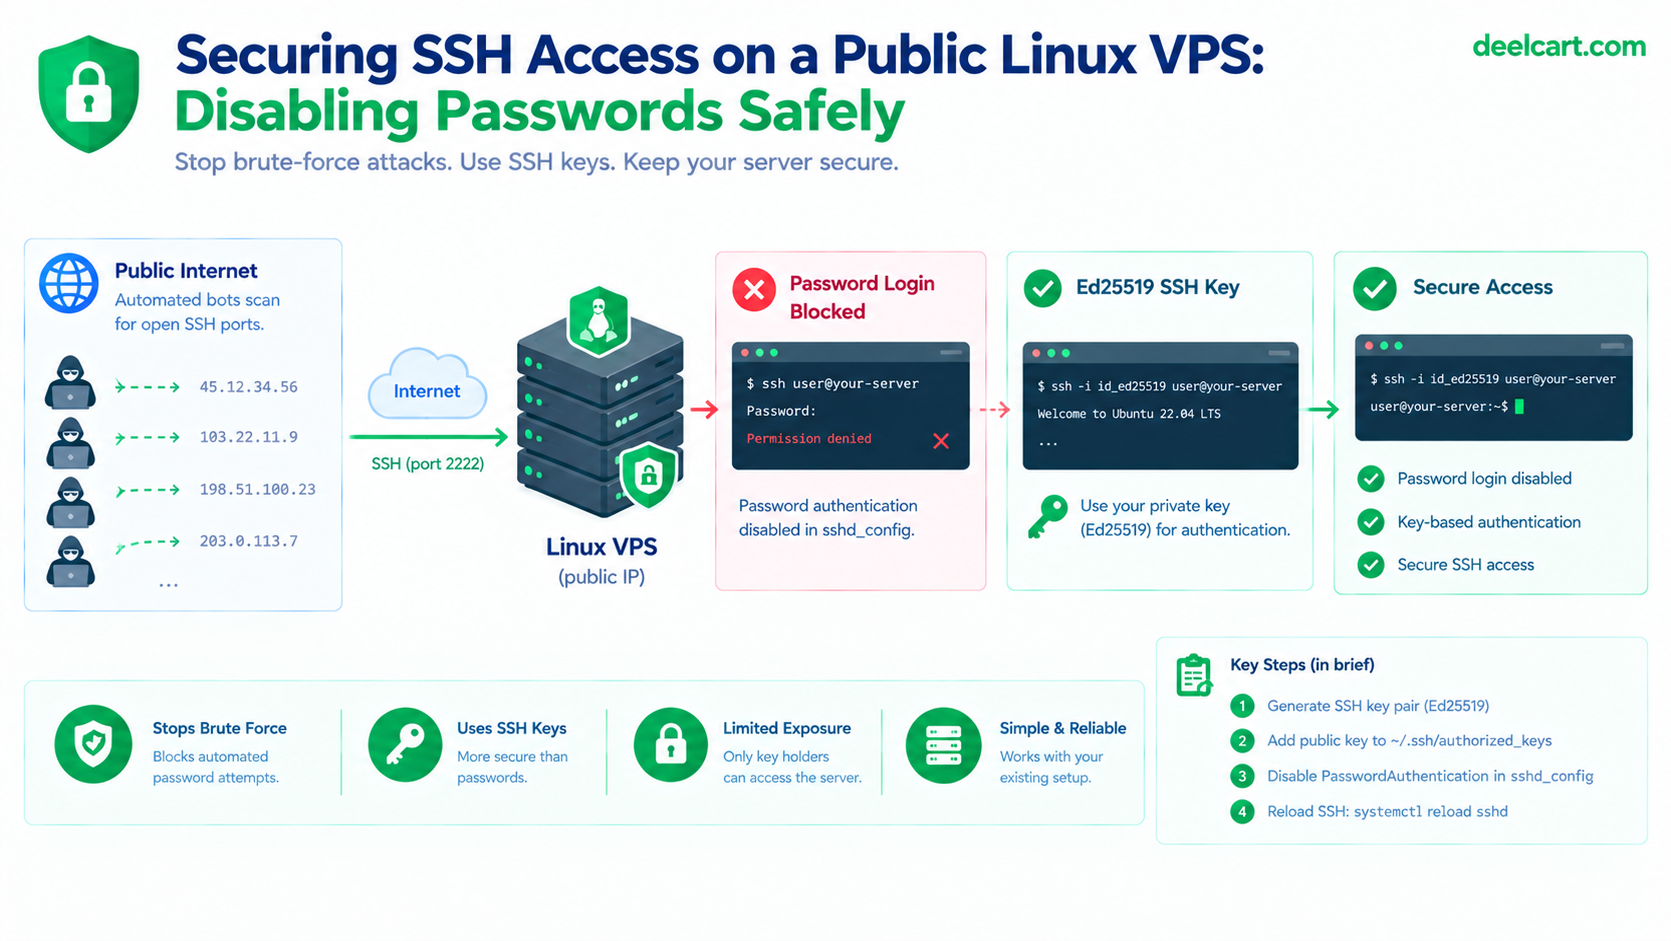
This is the exact sequence I follow to go key-only safely on a production droplet running several separate applications, where getting locked out isn't just inconvenient, it takes down everything on that box at once. It includes the one gotcha that catches most people on cloud images: you can set PasswordAuthentication no in the main config, restart SSH, and passwords will still work.
Before You Start: Build a Safety Net
Three things take two minutes and turn a possible disaster into a minor annoyance:
- Know your provider's out-of-band console. On DigitalOcean this is the Droplet Console in the control panel. It connects without using SSH at all, so it still works if you break the SSH daemon. Open it once now and confirm you can log in with a user and password, before you need it.
- Keep one SSH session open for the entire process. Every change below gets tested from a second window.
- Back up the config before editing anything:
sudo cp /etc/ssh/sshd_config /etc/ssh/sshd_config.bakIf anything goes wrong, restoring that file and restarting SSH puts you back where you started.
Step 1: Use a Non-Root User With sudo
Logging in as root over SSH means an attacker only has to guess one username. If you're still using root, create a regular user first and give it sudo:
adduser deploy
usermod -aG sudo deploy
Everything below assumes you log in as that user (I'll write it as user@your-server-ip). Confirm sudo whoami prints root for that account before going further. If you skip this and later disable root login, you will have nothing left to log in with.
Step 2: Generate and Deploy a Key Pair Locally
Before touching anything else on the server, generate a key pair on your local machine. Modern setups favor Ed25519 over older RSA keys. It's smaller, faster, and GitHub's own SSH key guidance recommends it as the default choice unless you're on a legacy system that doesn't support it:
ssh-keygen -t ed25519 -C "[email protected]"When prompted, set a passphrase. The key file is the only thing standing between an attacker and your server, so if your laptop is stolen or the file leaks from a backup, the passphrase is what keeps it useless. Use ssh-add (or your OS keychain) so you only type it once per session. The ssh-keygen manual covers the other options.
Then copy the public key over to the server. ssh-copy-id handles appending it to the right location automatically:
ssh-copy-id -i ~/.ssh/id_ed25519.pub user@your-server-ipStep 3: Verify Key Login Works Before Touching Anything Else
Do not proceed to disabling passwords until key-based login is confirmed working end to end. Test it with a fresh connection, forcing the key explicitly:
ssh -i ~/.ssh/id_ed25519 user@your-server-ip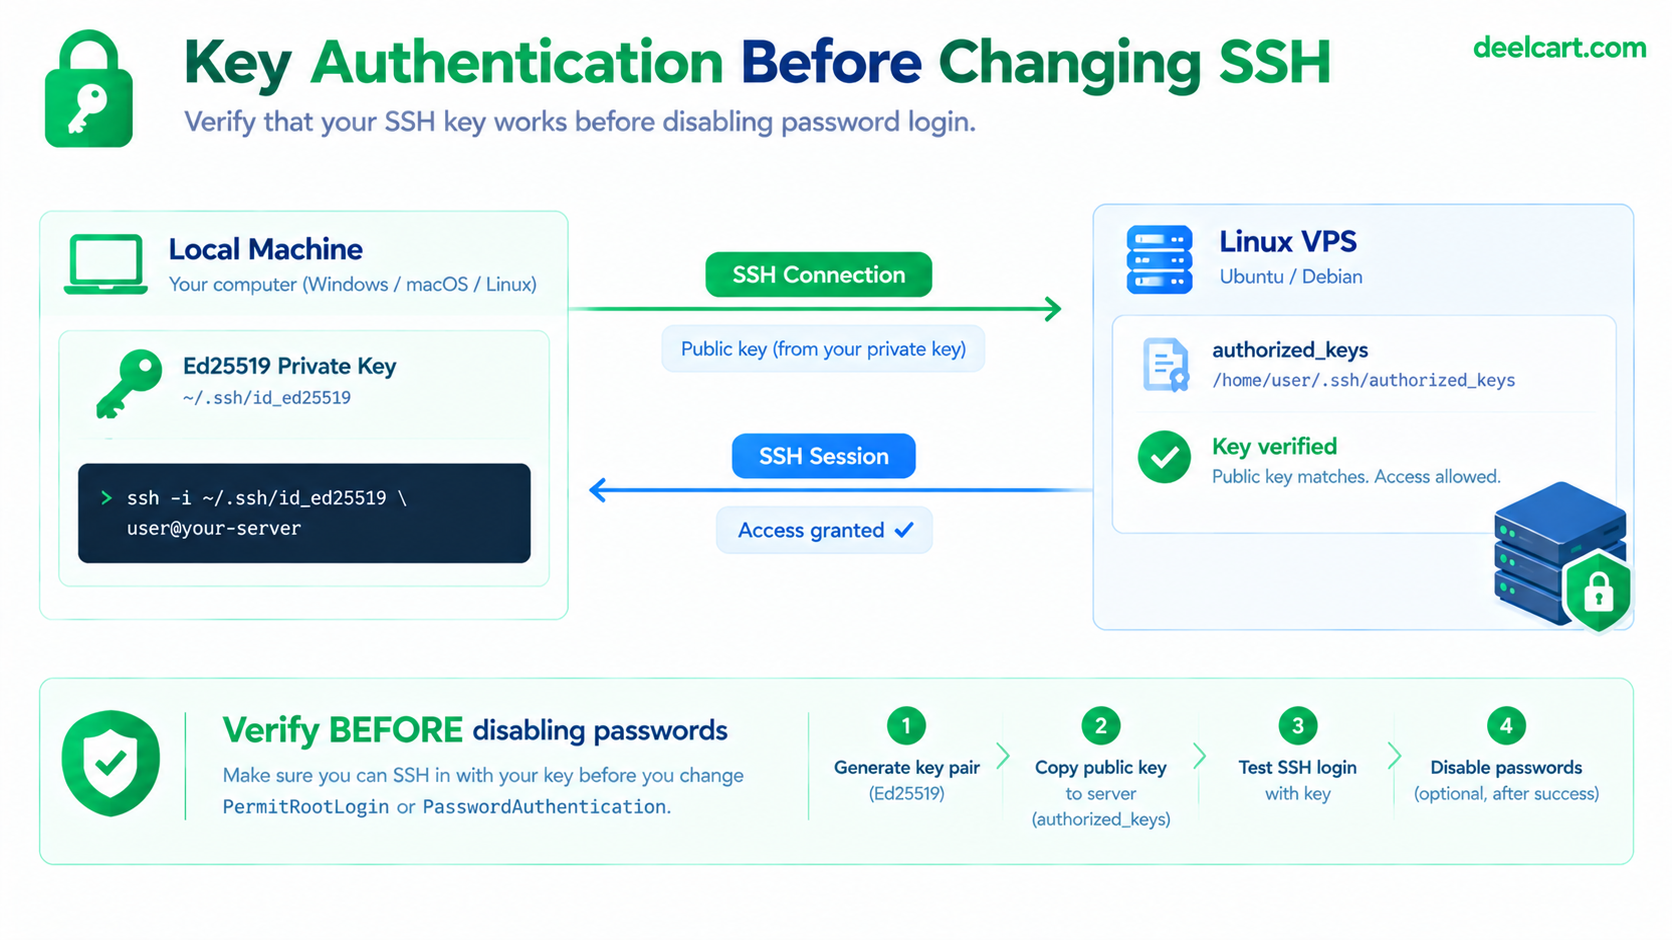
If it logs you in with no password prompt (or only asks for your key passphrase), the key deployed correctly. If it still asks for the server password, stop here. Something in the key or its permissions is wrong, and disabling password authentication now would lock you out the moment this session closes. The fixes for the common causes are in the troubleshooting section below.
Step 4: Edit sshd_config
With key access verified, edit the main OpenSSH daemon configuration, documented in full in the sshd_config manual:
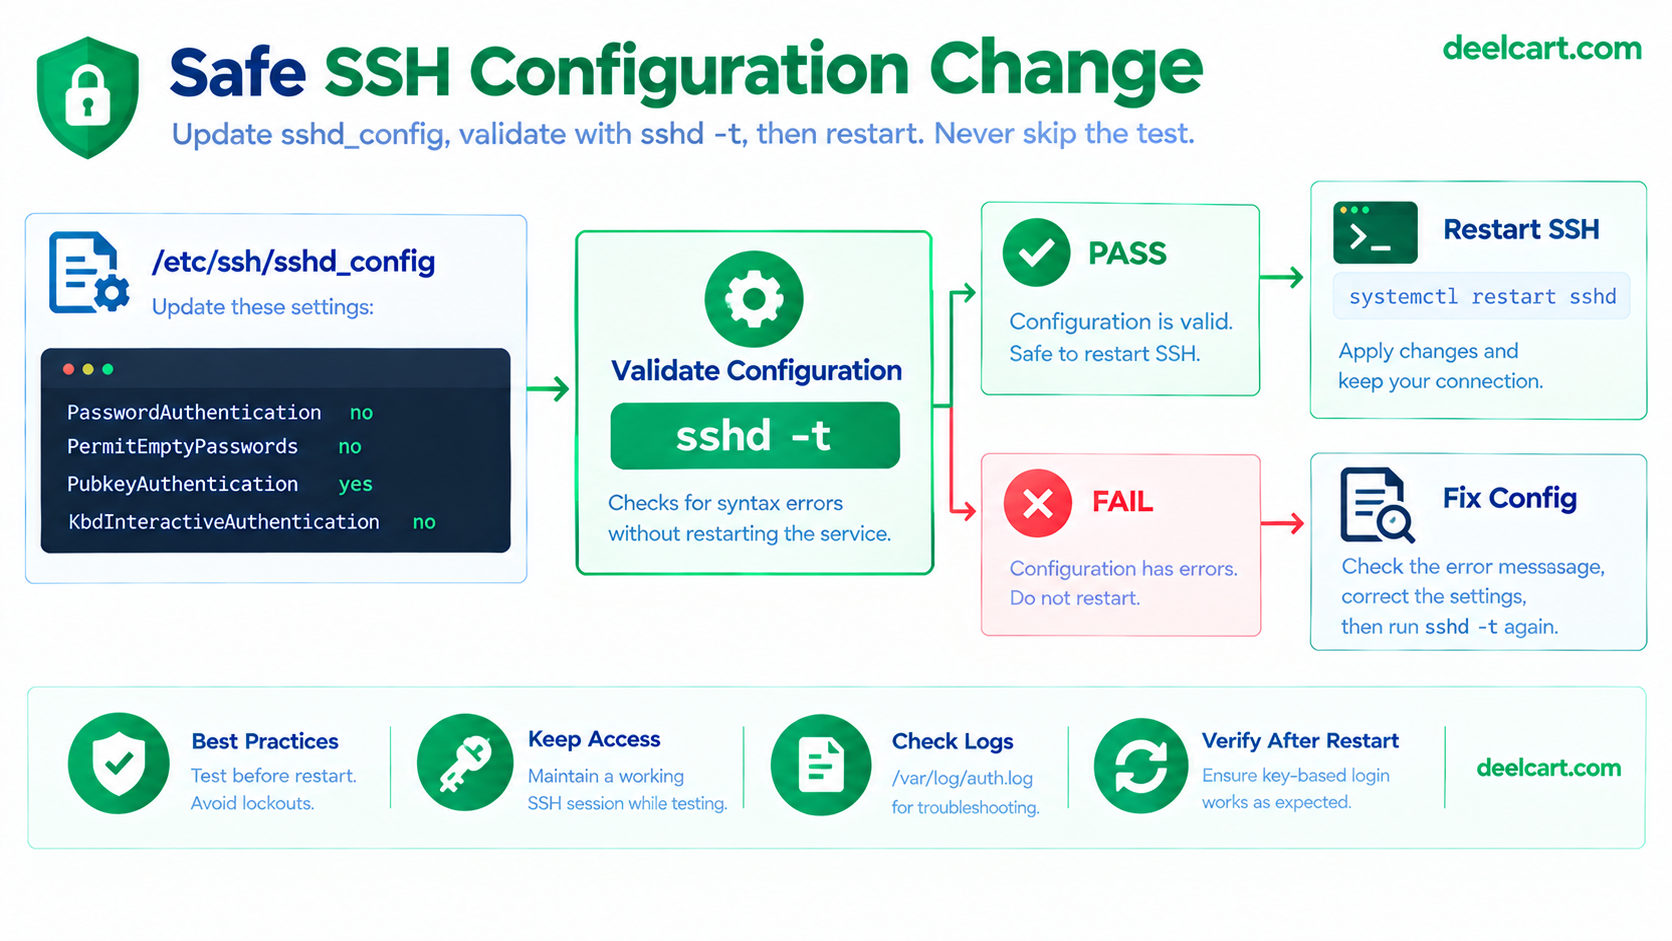
sudo nano /etc/ssh/sshd_configFind these directives, uncommenting them if needed, and set them exactly as follows:
PasswordAuthentication no
PermitEmptyPasswords no
PubkeyAuthentication yes
KbdInteractiveAuthentication no
PermitRootLogin prohibit-password
KbdInteractiveAuthentication is the current name for what older guides call ChallengeResponseAuthentication. On a modern OpenSSH both mean "don't offer password-like prompts through PAM", and you want it off, because otherwise a password can sneak back in through that path. PermitRootLogin prohibit-password lets root in only with a key; if you completed Step 1 you can use no instead.
Save and exit.
The Gotcha: Drop-In Files Override Your Edit
This is the part most guides skip, and it's the reason a server can look hardened but isn't. On Ubuntu 20.04+ and many cloud images, the top of /etc/ssh/sshd_config contains this line:
Include /etc/ssh/sshd_config.d/*.confOpenSSH uses the first value it finds for each setting. Because that Include comes first, any file in sshd_config.d/ wins over what you wrote lower down in the main file. Cloud-init images commonly ship a file such as 50-cloud-init.conf containing PasswordAuthentication yes, which silently cancels your change.
Check for it:
sudo grep -ri "PasswordAuthentication" /etc/ssh/sshd_config /etc/ssh/sshd_config.d/If a drop-in sets it to yes, change it to no there (or remove that line), keeping the same edit in the main file. Don't trust the file contents, though. Ask the daemon what it will actually use:
sudo sshd -T | grep -Ei "passwordauthentication|kbdinteractiveauthentication|permitrootlogin|pubkeyauthentication"You want to see passwordauthentication no, kbdinteractiveauthentication no, pubkeyauthentication yes and your chosen root login setting. sshd -T prints the effective, merged configuration, so it's the only check that can't be fooled by file ordering.
Step 5: Test the Config Before Restarting, Then Restart Carefully
This is the step that actually prevents a lockout. Before restarting the SSH daemon, validate the configuration's syntax:
sudo sshd -tAn empty response means the file is structurally valid. Only then restart the service. The service name differs by distribution: it's sshd on RHEL-family systems and ssh on Debian and Ubuntu (newer Ubuntu releases accept both):
sudo systemctl restart ssh   # Debian/Ubuntu
sudo systemctl restart sshd  # RHEL, Rocky, Alma
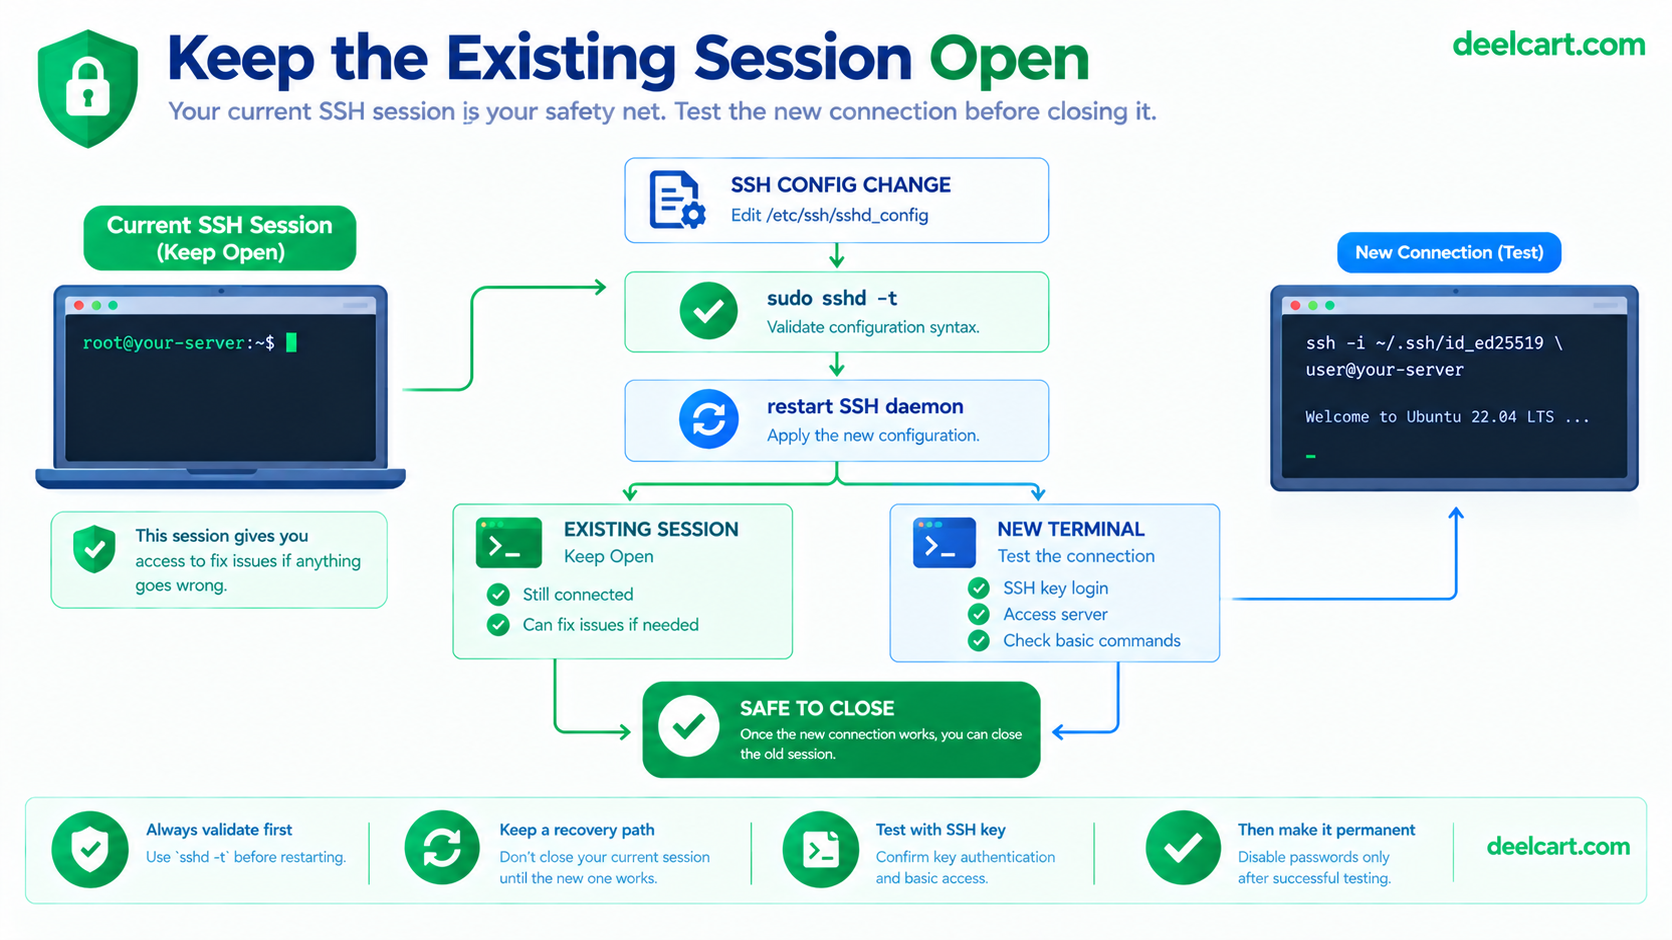
Do not close your current terminal. Keep the existing session open. If there's a hidden configuration mistake, closing this window is what turns it into a full lockout. Instead, open a brand new terminal window and attempt a fresh connection. Only once that new window logs in successfully should you close anything.
Step 6: Confirm Passwords Are Actually Dead
To genuinely verify the change took effect, attempt a connection that deliberately ignores your keys:
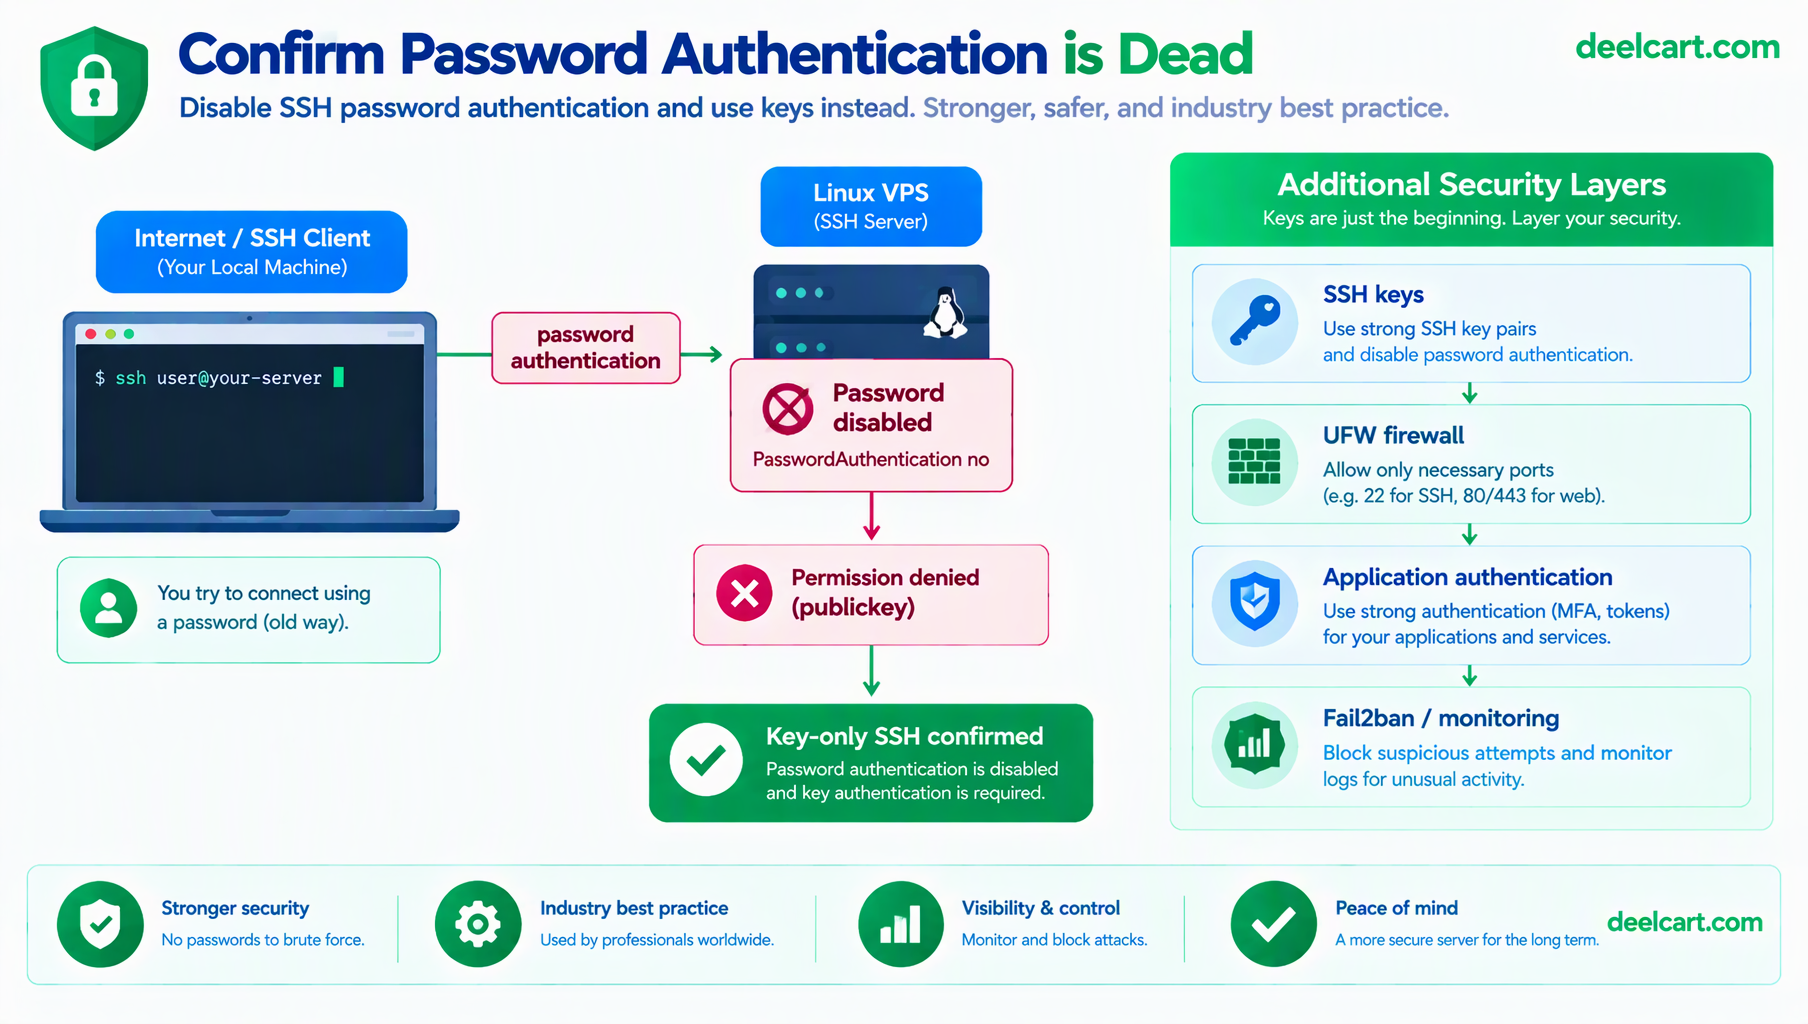
ssh -o PubkeyAuthentication=no user@your-server-ipA correctly hardened server refuses this outright with Permission denied (publickey), with no password prompt at all. That refusal is the server confirming it's no longer reachable by brute-force password guessing. If you still get a Password: prompt, go back to the drop-in section above, because that's almost always the cause.
Troubleshooting: When Key Login Still Asks for a Password
If Step 3 fails, don't guess. Ask both sides what happened. On your local machine, add verbose output:
ssh -vvv -i ~/.ssh/id_ed25519 user@your-server-ipLook for lines showing which keys were offered and whether the server accepted them. On the server (from the console or a still-open session), read the daemon's side of the story:
sudo journalctl -u ssh -n 50 --no-pager
sudo tail -n 50 /var/log/auth.log
The causes I run into most often:
- Wrong permissions. OpenSSH ignores keys if the directories are too open. The home directory must not be group- or world-writable,
~/.sshshould be700, and~/.ssh/authorized_keysshould be600. Fix withchmod 700 ~/.ssh && chmod 600 ~/.ssh/authorized_keys, and make sure the user owns them withchown -R user:user ~/.ssh. - Key added to the wrong user.
ssh-copy-idinstalls the key for the account you logged in as. If you copied it as root and then try to log in asdeploy, it won't be there. - Wrong key offered. If you have several keys, the client may try them in the wrong order and hit the server's attempt limit. Force the right one with
-iand-o IdentitiesOnly=yes. - Typos in
authorized_keys. The public key must be a single unbroken line. A line wrapped by a copy-paste silently fails.
Measure It: See What the Bots Were Doing
Once you're key-only, you can quantify what you've closed off. On a server that's been online a while, count the failed password attempts in the current auth log:
sudo grep -c "Failed password" /var/log/auth.logThe number depends entirely on how long the server has been exposed, but on an internet-facing machine it is rarely zero. After the change, new attempts show up as failed public key or "no authentication methods" entries instead, and none of them can succeed. That log is also the input fail2ban reads, covered below.
Frequently Asked Questions
What happens if I lose my private key file?
If passwords are disabled and the private key is lost, normal SSH login isn't possible. Recovery depends on your hosting provider's own out-of-band access method. On DigitalOcean specifically, the documented recovery process walks through resetting the root password and using the Recovery Console, which bypasses the SSH daemon entirely and lets you restore access or add a fresh key directly. This is also why you open the console during the "safety net" step rather than after the problem.
How do I add a second key, or revoke one?
Each line in ~/.ssh/authorized_keys is one allowed key. To add a teammate or a second laptop, run ssh-copy-id with their public key, or append the line yourself. To revoke access, delete that line. Because there are no passwords to rotate, removing the key is the entire offboarding step, which is one of the practical advantages over shared passwords.
Should I also change the default SSH port from 22?
Moving off port 22 cuts down log noise, since it stops most basic automated scanners from hitting the port at all, but it's security by obscurity, not actual hardening against a dedicated scan. Key-only authentication is what structurally secures the server; changing the port is just a smaller, optional step for cleaner logs, not a substitute. Be aware that on newer Ubuntu releases SSH can be started through a systemd socket, so changing Port in sshd_config may not take effect until you also update or disable ssh.socket. Test any port change from a second session, and open the new port in your firewall first.
Does this protect my applications too, not just the OS?
No, this only hardens the SSH gateway itself. An application exposing its own open port with weak credentials (a database, an admin panel) can still be compromised independently of how well SSH is locked down. Pairing key-only SSH with a system firewall like UFW, restricting which ports are reachable from the public internet at all, covers a layer this step doesn't touch. For the application layer in front of Node apps, I cover it in hardening an Nginx reverse proxy with security headers.
Is there anything else worth adding on top of key-only auth?
Fail2ban is a natural next step. It watches auth logs and temporarily bans IPs after repeated failed login attempts. With passwords already disabled, brute-force attempts against SSH can't succeed regardless, but fail2ban still reduces the noise and resource cost of bots hammering the port continuously, and covers other services beyond SSH if you point it at their logs too. If you ever suspect a server has already been compromised, my notes on detecting and recovering from a cryptomining compromise cover what to check, and setting up a swap file is another quick stability win on small droplets.
Justin is a self-taught developer who builds and runs DeelCart himself — from the articles to the server it runs on. He manages his own Linux infrastructure and writes guides based on tools and workflows he actually uses day to day.